You might not realize that your bathroom vanity can be one of the most transformative elements in your space. By exploring DIY options, you can elevate both its appearance and functionality with relative ease. Whether you choose to upcycle an old piece or construct a new one from scratch, the possibilities are vast. Imagine infusing personalized touches and clever storage solutions into your design. So, how do you decide which path is right for you, and what materials will best suit your vision?
Assessing Your Current Vanity
Before diving into your DIY vanity project, it's crucial to assess your current vanity. Take a moment to evaluate its condition, size, and style. Are you dealing with an outdated design that doesn't fit your taste, or is it simply in need of a refresh? Understanding the vanity styles available can help you decide what you want to achieve.
Next, think about your space considerations. Measure your bathroom to ensure the new or revamped vanity will fit comfortably. Consider the height, width, and depth, and don't forget to account for any fixtures like sinks or plumbing.
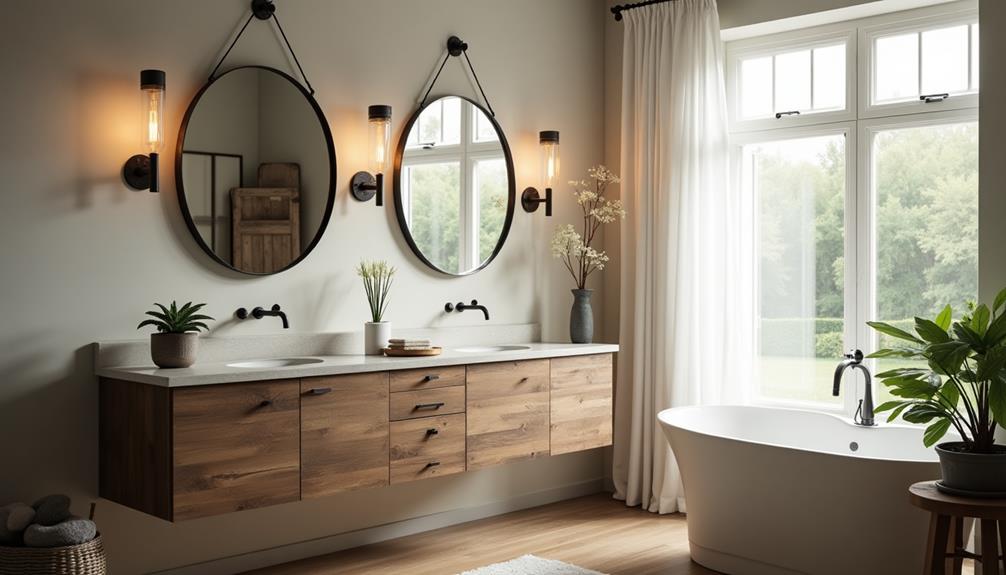
If your bathroom is small, you might want to explore wall-mounted vanities or those with compact designs. On the other hand, if you have ample space, a double vanity might be a great addition.
Look at your current layout and see how a new vanity could improve functionality. By assessing your current vanity closely, you'll set a solid foundation for your DIY project, ensuring that the final result complements both your style and the available space.
This proactive approach will save you time and effort down the road!
Choosing the Right Materials
When it comes to choosing the right materials for your DIY vanity, you'll want to weigh your options carefully. Start by considering material durability. You need something that can withstand the humidity and spills often found in bathrooms. Solid wood, plywood, and high-quality MDF are great choices for the structure. They offer strength and stability while adding a touch of elegance.
Next, think about the surface maintenance. You'll want a countertop that's not only stylish but also easy to clean. Materials like quartz or granite are both durable and low-maintenance, making them ideal for a bathroom setting. If you prefer a more budget-friendly option, laminate can mimic the look of stone while being easier to care for.
Don't forget about the finish of your vanity. Using a water-resistant sealant on wood can help prevent damage from moisture.
It's also wise to choose hardware that can resist corrosion, ensuring your vanity stays beautiful for years to come. By focusing on durability and maintenance, you'll create a DIY vanity that's not only functional but also a stunning focal point in your bathroom.
Upcycling an Old Vanity
If you've got an old vanity lying around, upcycling it can breathe new life into your bathroom without breaking the bank. Start by assessing the condition of your vanity. If it's structurally sound, you're off to a great start.
You can give it a fresh coat of paint or stain to match your bathroom's aesthetic. Consider using chalk paint for a matte finish that adds character.
Next, think about repurposing furniture elements. You might swap out outdated hardware for some chic, modern knobs or pulls. This simple change can make a huge difference in appearance.
If your vanity has a sink, try replacing it with a stylish vessel sink to enhance its vintage charm.
Don't forget about the countertop! You can cover it with a slab of reclaimed wood or a trendy laminate for a unique look.
If you've found a vintage mirror, hang it above the vanity to tie the room together.
Building a Vanity From Scratch
When you're ready to build a vanity from scratch, the first step is choosing the right materials that fit your style and budget.
You'll also need some essential tools to make the assembly process smooth and efficient.
Choosing the Right Materials
Building a vanity from scratch means you'll need to carefully pick the right materials to ensure durability and style.
Start by considering the primary structure. Solid wood, like oak or maple, offers excellent material durability and looks fantastic stained or painted. If you're aiming for a lighter weight option, plywood can work well too, as long as it's high-grade.
Next, think about the countertop. Materials like quartz and granite aren't only stunning but also incredibly durable, resisting scratches and moisture. If you're leaning towards eco-friendly options, recycled glass or bamboo countertops can provide a unique look while being sustainable.
Don't forget about the finish. Choose a water-resistant sealant to protect your wood from humidity, which is especially crucial in a bathroom setting.
For hardware, look for metal that can withstand moisture, like stainless steel or brass, to prevent rusting over time.
Lastly, if you're feeling adventurous, consider using reclaimed wood for a rustic charm.
Essential Tools Required
To successfully tackle your DIY vanity project, you'll often need a solid set of tools to ensure everything goes smoothly.
Start with basic hand tools like a tape measure for measuring space accurately, ensuring your vanity will fit perfectly in your bathroom. A level is also essential to confirm that your vanity sits straight, while a square will help you achieve precise angles during assembly.
Next, gather power tools to make the job easier. A circular saw is perfect for cutting your wood to size, and a drill will come in handy for making holes and driving screws.
Don't forget a sander to smooth out edges and surfaces for a polished finish.
When it comes to selecting hardware, having the right screws, brackets, and hinges is crucial. A box of assorted screws can save you time and frustration, while quality hinges will ensure your cabinet doors function smoothly.
Lastly, consider investing in a safety kit that includes goggles and gloves to protect yourself while working.
With these essential tools at your side, you're ready to bring your DIY vanity vision to life!
Step-by-Step Assembly Process
Before diving into the assembly process, gather all your materials and tools to ensure you have everything you need at hand.
Start by choosing your preferred vanity style—think about whether you want a modern look or something more traditional. With your design in mind, measure your bathroom space to optimize the vanity dimensions for a perfect fit.
Next, cut your wood pieces according to the dimensions you've planned. Assemble the frame first, making sure to use strong wood glue and screws for durability.
Once the frame is secure, attach the sides and the top, ensuring everything is level.
If you're adding drawers, now's the time to cut and assemble those, too. Install the drawer slides and attach the front panels.
Don't forget to sand down any rough edges for a polished finish.
Creative Paint and Finish Ideas
When it comes to transforming your bathroom vanity, bold color choices can make a striking impact.
You can also experiment with unique textured finishes or incorporate stencil and pattern techniques for added flair.
Let your creativity shine as you explore these fun options!
Bold Color Choices
Five vibrant color choices can transform your bathroom vanity from mundane to magnificent.
Start with a deep teal; it adds sophistication while pairing beautifully with metallics.
Next, consider a rich mustard yellow for a cheerful and inviting atmosphere. This color works well with bold accent pieces like patterned towels or decorative jars.
If you're feeling adventurous, try a striking coral. This vibrant hue injects energy and warmth, making it perfect for a lively space.
For a more subdued option, a soft lavender offers a calming effect that still packs a punch in a vibrant color palette.
Lastly, a classic navy blue can create a timeless elegance. This versatile shade complements various decor styles and looks stunning against light-colored walls.
When selecting your color, think about how each shade interacts with the rest of your bathroom.
Consider the light, fixtures, and other elements to ensure a harmonious look.
Unique Textured Finishes
To elevate your bathroom vanity beyond bold colors, consider incorporating unique textured finishes that add depth and character. Instead of just a flat coat of paint, explore textured wall treatments that can transform the entire look of your vanity. These treatments not only enhance visual interest but also introduce a tactile quality that draws the eye.
One innovative finish technique you can try is using a sponge or rag to create a faux finish, resembling natural materials like stone or wood. This approach gives your vanity a rustic charm while maintaining modern aesthetics. You could also experiment with metallic paint to add a touch of glam; a brushed or hammered finish can create an elegant effect.
Another option is to use a textured spray paint that mimics stucco or plaster. This can give your vanity a unique, handcrafted feel. Remember to prepare the surface properly and apply a primer to ensure even coverage.
With these creative ideas, you can take your bathroom vanity to the next level, setting it apart with unique finishes that reflect your personal style. Embrace these techniques to achieve a stunning, one-of-a-kind look!
Stencil and Pattern Techniques
A few stencil and pattern techniques can dramatically transform your bathroom vanity into a striking focal point. Start by selecting stencil designs that resonate with your style—floral, geometric, or even abstract patterns can add a unique touch.
Once you've chosen your stencils, you'll want to prepare your surface by cleaning and priming it to ensure the paint adheres well.
Next, consider pattern layering for added depth. Begin with a base color, then apply your first stencil design. Use painter's tape to secure the stencil and prevent any paint bleed.
Once the first layer dries, you can layer a second stencil in a contrasting color for a bold effect. This technique can create an eye-catching visual that elevates your vanity.
Don't be afraid to experiment! You can mix and match different stencil designs or even create a gradient effect with your paint colors.
Just remember to keep a steady hand and take your time with each layer. With these stencil and pattern techniques, your bathroom vanity can go from ordinary to extraordinary, reflecting your personal style beautifully.
Adding Functional Storage Solutions
When it comes to DIY vanity ideas, incorporating functional storage solutions can transform your bathroom into an organized oasis.
Start by evaluating your available space and consider how you can optimize it. A vanity with built-in drawers or shelves can significantly enhance your storage capacity. You might want to look for multifunctional designs, such as benches with hidden compartments or mirrors that double as cabinets.
If you're short on space, think vertically. Wall-mounted shelves or cabinets can create additional storage without taking up floor space. You can also use decorative baskets or bins to keep smaller items organized while adding a touch of style.
Don't forget about under-sink storage! Utilize that often-wasted area by adding stackable organizers or pull-out drawers. These solutions help you make the most of every inch, ensuring that your bathroom remains tidy and efficient.
Lastly, label your storage containers to quickly locate items when you need them.
Incorporating Stylish Accessories
After optimizing your bathroom's storage, it's time to enhance its overall look with stylish accessories. Start by choosing decorative mirrors that reflect your personal style and make your space feel larger. A bold, framed mirror can serve as a stunning focal point above your vanity, while smaller accent mirrors can add charm and depth.
Next, consider stylish lighting. Good lighting is essential for both functionality and ambiance. Swap out standard fixtures for modern sconces or a chic chandelier that complements your decor. Dimmers can also help you control the mood, allowing for bright light during the day and a softer glow at night.
Don't forget about additional accessories like elegant soap dispensers, chic trays, and plush towels. These small touches can elevate your bathroom's aesthetic without overwhelming the space.

