If you're looking to breathe new life into your kitchen or bathroom, painting your cabinets could be the perfect solution. You can transform the entire aesthetic with just a few steps, but it starts with assessing the current state of your cabinets and gathering the right supplies. From cleaning and sanding to choosing the right paint, each phase is crucial for achieving a professional finish. So, what are the key steps you need to follow to ensure your project turns out flawlessly? Let's explore the essential process together.
Assess Your Cabinets
Before diving into your cabinet painting project, take a moment to thoroughly assess your cabinets.
Start by examining the cabinet styles you currently have. Are they modern, traditional, or something in between? This will help you determine how to approach your painting project. If your cabinets lean toward a classic style, you might want to stick with timeless colors, while more contemporary designs could benefit from bold, trendy hues.
Next, consider the condition of your cabinets. Are they structurally sound, or do they show signs of wear and tear? If they're in good shape, you can focus on aesthetics.
Look at current color trends that resonate with you and fit your space. Soft neutrals are always in vogue, but don't shy away from vibrant shades if they match your vision.
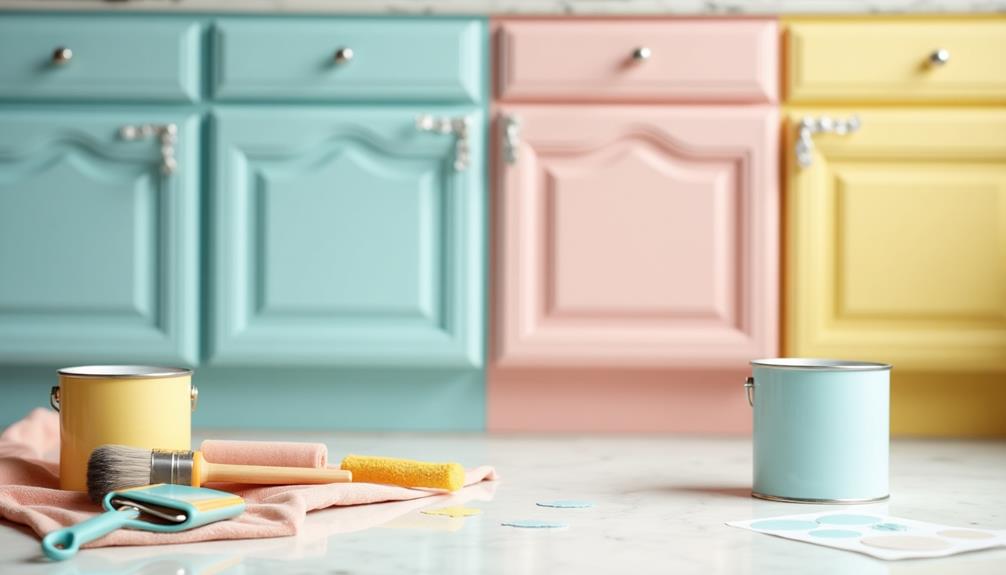
Gather Necessary Supplies
Before you start painting your cabinets, you'll need to gather the right supplies.
This includes essential tools, an overview of paint types, and some important safety gear.
Having everything ready ensures a smoother process and better results.
Essential Tools Required
To achieve a professional-looking cabinet makeover, you'll need a solid set of tools at your disposal. Start with a variety of brush types; a high-quality angled brush is perfect for corners and detailed areas, while a flat brush works well for larger surfaces.
Don't forget a foam roller for a smooth finish on flat panels.
Next, gather your painting supplies. You'll need painter's tape to protect edges and create clean lines, along with a drop cloth to keep your workspace tidy.
A sanding block or electric sander will help you prep the surface by smoothing out imperfections, ensuring the paint adheres properly.
For applying paint, consider a good quality paint sprayer if you're looking for an even finish, but a brush is often sufficient for smaller projects.
You'll also want to have a paint tray and liners on hand, which make pouring and cleaning easier.
Lastly, choose your paint finishes wisely. A satin or semi-gloss finish is often best for cabinets, as it provides durability and an attractive sheen.
With these essential tools, you're well on your way to transforming your cabinets!
Paint Types Overview
Choosing the right paint type is crucial for a successful cabinet project. You'll want to consider several options, each with its own benefits.
Acrylic paint is a popular choice due to its quick drying time and easy clean-up. It offers good durability and comes in various colors, making color selection a breeze.
Oil-based paint, while more challenging to clean up, provides a tough, long-lasting finish. It's ideal for high-traffic areas but takes longer to dry.
If you're looking for a unique texture, consider chalk paint. It gives a matte finish that's perfect for a vintage look, but it may require sealing for added durability.
Spray paint is another option, offering a smooth, even coat. It's great for smaller projects or touch-ups but can be tricky for larger cabinets.
For a polished, professional appearance, go for an enamel finish. This paint type provides excellent resistance to scratches and stains, ensuring your cabinets stay looking fresh.
Ultimately, your choice should balance color selection and paint durability, ensuring your cabinets remain beautiful for years to come.
Safety Gear Importance
Safety gear is essential when painting cabinets, as it protects you from harmful fumes and potential injuries. Before you start, gather the necessary personal protection supplies to ensure a safe DIY experience.
Start with a quality respirator mask. This will filter out any harmful chemicals in the paint and prevent you from inhaling toxic fumes. Next, invest in safety goggles to shield your eyes from splatters and dust.
Don't forget about gloves—nitrile or latex gloves are perfect for keeping your hands safe from harsh paint chemicals. Additionally, wearing old clothes or a painter's suit can help protect your skin and clothing from stains.
If you're working in a poorly ventilated area, consider having a fan or air purifier nearby to improve airflow and reduce inhalation risks.
Prepare the Workspace
Before you start painting, clear the area around your cabinets to create a safe workspace.
Gather all the necessary supplies, like drop cloths and paint, to keep everything organized.
Don't forget to ensure proper lighting so you can see every detail as you work.
Clear the Area
To ensure a smooth painting process, you'll want to clear the area around your cabinets. Start by removing all items from the countertops and cabinet interiors. This includes dishes, appliances, and any decorative elements.
When you create a clean space, you'll avoid potential damage and make the painting process much easier.
Next, consider moving any nearby furniture to prevent paint splatters and drips. If you can't move larger pieces, cover them with drop cloths to protect against any accidental spills.
You'll also want to take down cabinet doors, handles, and hardware. This won't only give you a better surface to paint but also allow you to explore different cabinet styles without interference.
Gather Necessary Supplies
With the area cleared and ready for work, it's time to gather the necessary supplies for painting your cabinets. You'll need a few essential items to ensure your project goes smoothly. Start by selecting your desired cabinet color; consider samples and swatches to find the perfect shade.
Next, grab high-quality paint, ideally one designed for cabinets, as it withstands wear and tear better than standard paint. Don't forget the primer, which helps with adhesion and enhances the final finish.
You'll also need various brushes and rollers, depending on your preferred painting techniques. A foam roller works well for smooth surfaces, while brushes are great for corners and detailed areas.
Additionally, purchase painter's tape to protect surfaces and achieve clean lines. A drop cloth is essential for protecting your floor, and a paint tray will make applying paint easier.
Be sure to have sandpaper or a sanding block on hand for prepping the cabinets, along with a tack cloth for dust removal. Finally, consider wearing a mask and gloves to protect yourself from fumes and paint.
Once you've gathered everything, you'll be ready to begin your cabinet transformation!
Ensure Proper Lighting
Good lighting is crucial for achieving a flawless finish when painting your cabinets. Without the right light, you might miss imperfections or uneven strokes, which can ruin your hard work.
Start by assessing your workspace. Ideally, you want to paint in a well-lit area, preferably near windows or under bright overhead lights.
Consider using multiple lighting techniques to eliminate shadows and ensure even illumination. For instance, a combination of natural light and LED lamps can work wonders.
When selecting bulbs, pay attention to the color temperature; a range of 5000 to 6500 Kelvin mimics daylight and helps you see true colors more clearly.
Position your lights at different angles to minimize glare and enhance visibility. If possible, use a portable work light to spotlight specific areas as you paint.
Clean and Sand Cabinets
Cleaning and sanding cabinets are crucial steps that set the foundation for a successful paint job. Start by removing all items from your cabinets, including shelves and hardware.
Use a solution of warm water and mild detergent to wipe down every surface, removing grease and grime. This ensures your new paint adheres properly. Rinse with clean water and let everything dry completely.
Next, it's time to sand. Depending on the cabinet styles you're working with, choose a medium-grit sandpaper to scuff up the surface. This process helps the paint stick better.
Pay attention to any glossy finishes; you want to create a rough surface for maximum adhesion. Don't forget to sand the edges and corners, as these areas often get overlooked.
Once you've finished sanding, vacuum the dust away and wipe down the cabinets with a damp cloth. This step is essential for a smooth finish.
Now that your cabinets are clean and sanded, you're ready to explore color trends and choose the perfect shade for your fresh look.
Apply Primer
After ensuring your cabinets are clean and sanded, applying primer is the next essential step. Primer creates a smooth surface for the paint, enhances adhesion, and helps achieve a professional finish.
Choose the right primer type based on your cabinet material. For wooden cabinets, a water-based primer works well, while oil-based primers are better for laminate surfaces.
Before you begin, gather your tools: a high-quality brush, foam roller, or a spray gun. If you're using a brush or roller, remember to use even strokes for a consistent layer. If you opt for spraying, maintain a steady distance and keep the nozzle moving to avoid drips.
Apply the primer in thin, even coats. Start with the edges and corners using a brush, then fill in the larger surfaces with a roller for efficiency.
Be sure to allow adequate drying time between coats—check the manufacturer's instructions for specifics. Depending on the primer type and the desired coverage, you might need two coats.
Once the primer's dry and you've smoothed any imperfections, you're ready to move on to painting your cabinets for that fresh look you want!
Paint the Cabinets
With the primer fully dried and your surface prepped, it's time to paint the cabinets. First, you'll want to make your color selection. Choose a shade that complements your space and reflects your personal style. Whether you go for a bold hue or a classic white, the right color can transform your kitchen.
Next, gather your paint and tools. A high-quality paintbrush and a foam roller work well for smooth application. If you're working with intricate designs, a brush will allow you to reach all the nooks and crannies. For flat surfaces, a roller ensures even coverage.
When you're ready to start, apply the paint using your chosen techniques. Begin with a thin coat, moving in long, smooth strokes. Don't overload your brush or roller; it's better to layer multiple thin coats than to apply one thick coat.
Allow each coat to dry before applying the next, following the manufacturer's instructions. This is crucial to achieving a professional finish.
Once you've painted all the cabinets, step back and admire your work. You're one step closer to a fresh, updated look!
Finishing Touches and Reassembly
As you admire your newly painted cabinets, it's time to focus on the finishing touches and reassembly. Start by selecting the right hardware. Whether you prefer sleek modern knobs or classic pulls, your hardware selection can dramatically enhance the overall look. Experiment with different styles to find the perfect match for your updated cabinets.
Next, consider some finishing techniques to elevate your project. If you want a polished look, apply a clear topcoat to protect the paint and add a subtle sheen. This not only enhances durability but also makes cleaning easier.
Don't forget to let each coat dry completely, following the manufacturer's instructions.
Once your finishing touches are complete, it's time to reassemble the cabinets. Carefully attach the hinges and hardware, ensuring everything is aligned and secure. If you labeled your doors and drawers during disassembly, this process should be smooth.

