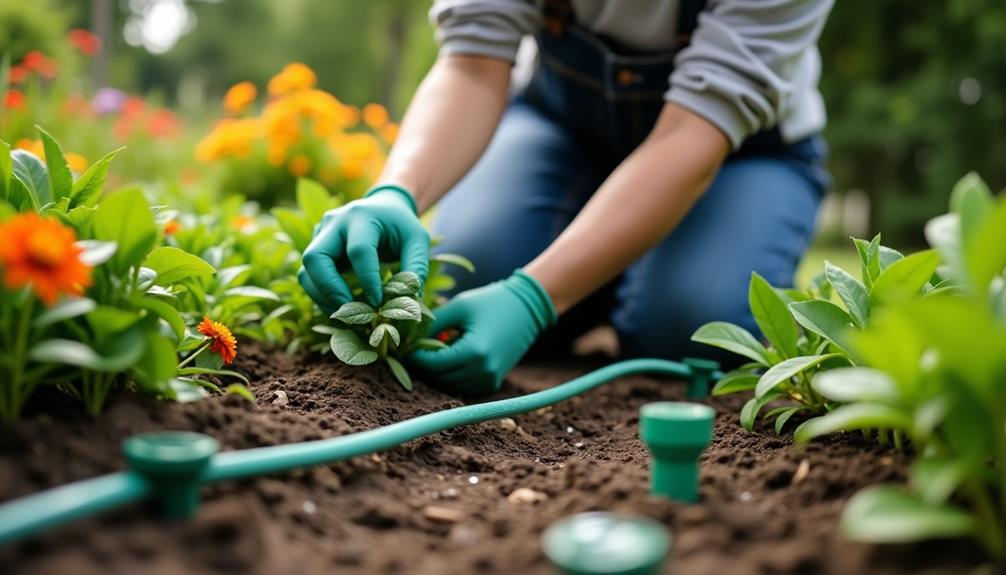
When you're ready to install a drip irrigation system in your garden, it's essential to start with a solid plan. You'll want to assess your plants' specific watering needs and map out your garden zones accordingly. Gathering the right materials, like polyethylene tubing and emitters, is crucial for an efficient setup. As you lay out the main line and strategically place the emitters, you'll realize that proper installation can make a significant difference in plant health. But before you proceed, consider the maintenance aspects that can keep your system running smoothly for years to come.
Benefits of Drip Irrigation
Drip irrigation offers a range of benefits that can transform your gardening or farming experience. One of the most significant advantages is water conservation. By delivering water directly to the root zones of your plants, you minimize evaporation and runoff, ensuring that every drop counts. This efficient system means you can use up to 50% less water compared to traditional methods, which is especially crucial in drought-prone areas.
Additionally, drip irrigation promotes better soil health. Since water is applied slowly and evenly, it helps maintain optimal moisture levels, preventing soil erosion and nutrient leaching. Healthy soil supports robust root development, leading to healthier plants that can resist pests and diseases more effectively.
Moreover, you'll notice that drip irrigation reduces weed growth. By watering only the plants you want to thrive, you limit moisture availability for unwanted weeds, making your gardening efforts more manageable.
Planning Your Layout
Before you start installing your drip irrigation system, it's crucial to assess your garden's watering needs.
Take the time to map out your garden zones and determine the best plant spacing for optimal water distribution.
This foundation will ensure your system operates efficiently and effectively.
Assess Watering Needs
Effective planning is crucial when it comes to installing a drip irrigation system tailored to your garden's unique requirements. Start by assessing the watering needs of your plants. Different plants have varying soil moisture preferences and water requirements, so it's essential to understand these factors before you begin.
Consider the types of plants you're growing. Some may thrive with less water, while others need more frequent irrigation. Check the soil moisture levels in your garden; this helps you gauge how much water your plants currently receive and how much they'll need from your irrigation system. You can use a moisture meter or simply dig down a few inches to feel the soil.
Think about the time of day you'll be watering as well. Early morning is often the best time, as it allows plants to absorb moisture before the heat of the day.
Additionally, keep in mind any local climate factors that might affect your garden, such as humidity and temperature. By thoroughly assessing these watering needs, you'll set a strong foundation for your drip irrigation system, ensuring your plants thrive throughout the growing season.
Map Garden Zones
As you plan your drip irrigation system, mapping out garden zones is essential to ensure efficient water distribution. Start by evaluating your garden design and identifying different areas based on plant types and their specific watering needs.
Divide your garden into zones that reflect how much water each section requires. For instance, grouping together plants with similar moisture needs will make it easier to customize your watering schedule.
Next, sketch a simple layout of your garden, marking each zone clearly. Consider factors like sun exposure, soil type, and drainage, as these elements significantly impact how much water your plants will need.
If you have areas that dry out faster, such as those in full sun, designate them as separate zones requiring more frequent watering.
Once you have your zones mapped out, you can plan your drip irrigation system accordingly. This won't only help you save water but also promote healthier plant growth.
With a clear understanding of your garden zones, you'll be well on your way to creating a functional and efficient drip irrigation system tailored to your garden's unique needs.
Determine Plant Spacing
Achieving optimal plant spacing is crucial for a successful drip irrigation system. When planning your layout, consider the specific needs of different plant types. Each plant has its own spacing requirements based on growth habits and size. For instance, larger vegetable plants like tomatoes need more room than smaller herbs like basil.
Next, take into account your soil conditions. Well-draining soil allows roots to spread more freely, which can affect how closely you can plant. If your soil retains too much moisture, consider spacing plants further apart to prevent root rot and other diseases.
As you determine plant spacing, remember to factor in the mature size of your plants. It's better to start with a wider spacing and adjust as needed than to overcrowd your garden.
Also, consider the drip irrigation emitters' placement. Each emitter should deliver water directly to the root zone of each plant, so ensure your layout allows for that.
Materials Needed
Before you get started on your drip irrigation system, you'll need to gather some essential materials.
This includes tools, tubing, connectors, and fittings that fit your specific layout.
Let's break down what you'll need to make the installation process smooth and efficient.
Essential Tools Required
To successfully install a drip irrigation system, you'll need a few essential tools and materials. First, grab a pair of garden scissors or a sharp utility knife. These will help you cut tubing accurately, avoiding common mistakes that can lead to leaks.
You'll also want a measuring tape to ensure you get the right lengths for your garden layout, which is crucial for understanding the drip irrigation basics.
Next, you'll need a hole punch to create openings in the mainline tubing for emitters. A stake or anchor will help secure the tubing in place, preventing it from shifting.
Don't forget a pair of pliers for tightening fittings and connectors, ensuring a snug fit.
Lastly, it's wise to have a filter or pressure regulator on hand. This equipment protects your system from debris and manages water pressure, which is essential for optimal performance.
With these tools, you'll set yourself up for success in your drip irrigation project. By having everything ready, you can avoid those pesky common mistakes and create an efficient watering system for your garden.
Types of Tubing
Selecting the right tubing is crucial for your drip irrigation system's efficiency and longevity. You'll primarily encounter two types of tubing: polyethylene tubing and soaker hoses. Each has its unique advantages, so you'll want to choose based on your garden's specific needs.
Polyethylene tubing is a popular choice due to its durability and flexibility. It comes in various diameters, allowing you to customize the layout of your system. This type of tubing is resistant to UV rays and can last for many years, making it a reliable option for long-term use.
On the other hand, soaker hoses are designed for a more passive approach to watering. They allow water to seep out along their entire length, providing even moisture to your plants. This can be especially beneficial for flower beds or rows of vegetables where you want to ensure consistent watering without the need for complicated setups.
Connectors and Fittings
When setting up your drip irrigation system, having the right connectors and fittings is essential for a seamless installation.
You'll encounter various connector types, such as barbed connectors, insert fittings, and compression fittings. Each serves a unique purpose, so it's crucial to choose the right one for your setup.
Barbed connectors are great for joining tubing, while insert fittings work well for connecting larger pipes. Compression fittings provide a secure seal, preventing leaks.
Make sure to select appropriate fitting sizes that match your tubing diameter to ensure a tight fit. Typically, 1/4-inch to 1/2-inch tubing is common in drip systems, but always double-check your specific measurements.
In addition to these, you'll need goof plugs to seal any holes you don't want water to flow through.
Don't forget about end caps, which are necessary for closing off the ends of your tubing.
With the right connectors and fittings, you'll create a reliable irrigation system that delivers water efficiently to your plants.
Installing the Main Line
As you prepare to install the main line for your drip irrigation system, understanding the layout and materials is crucial for a successful setup.
Begin by deciding the path your main line will take, ensuring it's close to your plants for efficient water distribution. Use PVC or polyethylene tubing for the main line, as they're durable and suited for handling water pressure.
Next, measure and cut the tubing to fit your planned layout. Be sure to account for any bends, turns, or obstacles in your garden.
When laying out the main line, keep it as level as possible to maintain consistent water flow. If your water pressure is low, consider using a pressure regulator to ensure even distribution throughout the system.
Connect the tubing to your water source, checking for secure fittings to prevent leaks.
Once everything is connected, turn on the water supply to test the main line installation. Watch for any leaks or pressure issues, adjusting as necessary.
Adding Emitters
Adding emitters is a critical step in customizing your drip irrigation system to meet the specific needs of your plants. You'll need to choose the right emitter types based on the water requirements of your plants and the soil type in your garden. There are several options available, including pressure compensating, adjustable, and non-pressure compensating emitters.
Once you've selected your emitters, focus on emitter placement. For plants with high water needs, place emitters closer to the root zone, ensuring they receive adequate moisture. Conversely, for drought-tolerant plants, you can space them farther apart.
As a general rule, aim for one emitter per plant or a few for larger plants. If you're watering rows of plants, consider installing emitters along the main line at regular intervals. This strategic placement will help distribute water evenly.
Make sure to secure the emitters to the tubing to prevent leaks. You might also want to use stakes or holders to keep them in place, especially in windy conditions.
With careful emitter placement and the right types, you'll create an efficient watering system tailored to your garden's needs.
Testing the System
Once you've installed your drip irrigation system, it's crucial to test it to ensure everything functions properly. Start by checking the system pressure. You can do this with a pressure gauge attached to the mainline. Ideally, your pressure should be between 20 and 30 psi, which is optimal for drip systems. If the pressure is too low or too high, you may need to adjust your setup accordingly.
Next, look for any signs of leaks. Turn on the system and walk along the entire length of the tubing, paying close attention to connections and emitters. If you spot any water pooling or dripping from fittings, you've got a leak that needs fixing. Tighten connections or replace faulty components as necessary.
Don't forget to observe the emitters themselves. Each should deliver a steady stream of water; if some are clogged or not functioning, clear them out or replace them.
After completing these checks, turn the system off and evaluate how evenly water is distributed across your garden. This testing phase is essential to ensure your drip irrigation system operates efficiently and effectively, providing your plants with the hydration they need.
Maintenance Tips
To keep your drip irrigation system running smoothly, regular maintenance is essential.
Start by checking for leaks and blockages in the tubing or emitters. A simple visual inspection can often reveal issues. If you notice any clogs, use a thin wire or a specialized tool to clear them out.
Next, flush your system periodically. This helps to remove any sediment buildup that could affect water flow. You can do this by turning on the system and letting it run for a few minutes.
Also, consider system upgrades as your garden evolves. Adding new plants or changing your layout might require additional emitters or longer tubing.
Don't forget to inspect your filter regularly. A clogged filter can lead to poor performance, so clean or replace it as necessary.

