Imagine stepping into your backyard, greeted by a stylish pergola that casts dappled sunlight across your favorite seating area. You might think creating such an inviting space requires a hefty investment, but it doesn't have to. With the right planning and material choices, you can construct a beautiful DIY pergola without breaking the bank. So, what are the essential steps you need to take to ensure your project is both budget-friendly and visually appealing? Let's explore how to bring your vision to life while keeping costs in check.
Determine Your Pergola Location
When choosing a spot for your pergola, think about where you'll get the most enjoyment out of it.
Consider your yard's layout and how you currently use the space. Are there areas that feel too exposed? Maybe you want more privacy from neighbors, which will guide your decision.
Sunlight exposure plays a key role in your pergola's location. Ideally, you'll want to find a spot that balances shade and sunlight.
If you love basking in the sun, place it where it'll catch those rays during the day. Conversely, if you prefer a cooler retreat, look for a position that maximizes shade, especially in the hotter months.
Don't forget about privacy considerations. You might want to angle the pergola to shield yourself from prying eyes, or plant some greenery nearby to create a natural barrier.
This can enhance your outdoor experience, making it feel more like a secluded getaway.
Choose the Right Materials
Selecting the right materials for your pergola can greatly impact its durability and appearance. When it comes to wood selection, consider using treated lumber or naturally rot-resistant woods like cedar or redwood. These choices not only add beauty but also promise longevity against the elements.
If you're on a budget, pressure-treated pine is an affordable option, though it may require more maintenance over time.
Weather resistance is crucial for ensuring your pergola withstands rain, sun, and snow. Look for wood that has been treated for outdoor use, which can help prevent warping and cracking. You might also want to apply a weatherproof sealant after installation to prolong the life of your wood.
Don't forget about the hardware. Stainless steel or galvanized screws and brackets are essential to prevent rusting, especially if you live in a humid area.
Lastly, consider adding a protective finish or stain to enhance the wood's natural color and further shield it from the elements. Choosing the right materials will set a strong foundation for your DIY pergola and ensure it remains a beautiful addition to your outdoor space for years to come.
Design Your Pergola
With the right materials in hand, you can now focus on how to design your pergola to fit your space and style.
Start by considering different pergola styles that work best for your backyard. Whether you prefer a classic look with a traditional gable design or a more modern, minimalist approach, your pergola should reflect your personal taste.
Next, think about the size. Measure your space accurately to ensure your pergola doesn't overwhelm your yard or feel too small. A well-proportioned structure enhances the overall aesthetic of your garden.
Additionally, consider the height of your pergola; a taller design can create a sense of openness, while a lower one can provide a more intimate atmosphere.
Don't forget about aesthetic considerations like color and finish. If your home has a specific color scheme, choose materials that complement it. You can also incorporate climbing plants or fabrics to enhance the visual appeal.
Gather Necessary Tools
Before you get started on your pergola, you'll need to gather some essential tools.
Don't worry if you're on a budget; there are plenty of affordable alternatives that can still get the job done.
Let's explore what you'll need to make your project a success.
Essential Tools Required
To build your DIY pergola, you'll need to gather a few essential tools that will make the process smoother and more efficient.
First, you'll want a tape measure for precise measurements during your pergola planning. A level is crucial to ensure your structure is straight and stable.
You'll also need a circular saw or a miter saw to cut the wood to the appropriate lengths. A drill with various bits will help you create pilot holes and drive screws securely.
Don't forget a hammer, which is essential for nailing components together. For safety, always wear protective gear like goggles and gloves when operating power tools.
A sturdy ladder will also be necessary for reaching higher areas of your pergola.
Budget-Friendly Alternatives
When crafting your DIY pergola on a budget, consider using some budget-friendly alternatives for your tools. Instead of investing in expensive equipment, look around your home and see what you can repurpose. For instance, an old saw or drill may still have some life left in them.
You can even borrow tools from friends or family, saving you money while building community connections.
If you need additional supplies like hammers or measuring tapes, check local thrift stores or garage sales. You might find high-quality tools at a fraction of the price. Another option is to join a local tool library, where you can borrow tools for your project without the commitment of purchasing them.
When it comes to creative designs, think outside the box. Use repurposed materials like pallets or reclaimed wood to enhance your pergola's aesthetics while sticking to your budget.
Not only will this save you money, but it'll also give your project a unique flair that reflects your personal style. With a bit of ingenuity, you can gather everything you need without breaking the bank.
Step-by-Step Construction
Now that you've gathered your tools, it's time to focus on the construction of your pergola.
Start by gathering all the necessary materials, then move on to constructing the frame.
Gather Necessary Materials
Creating your own pergola starts with gathering the necessary materials, ensuring you have everything at hand for a smooth construction process. First, decide on the size and design of your pergola, as this will dictate the materials you'll need. For a sturdy structure, you'll typically require pressure-treated lumber, such as 4×4 posts and 2×6 beams. Don't forget screws, joist hangers, and wood glue for added strength.
Next, consider the aesthetics of your pergola. Choose wood that complements your home and outdoor space—cedar or redwood can enhance the visual appeal while providing durability. If you want to improve outdoor functionality, think about adding a canopy or climbing plants to provide shade and create a cozy atmosphere.
Additionally, gather tools like a saw, drill, level, and measuring tape to ensure precision during assembly. Having a partner can make the process easier, especially for holding materials in place.
Lastly, keep safety gear handy—gloves, goggles, and a hard hat can prevent injuries as you work. With everything ready, you'll be set to start constructing your DIY pergola!
Construct the Frame
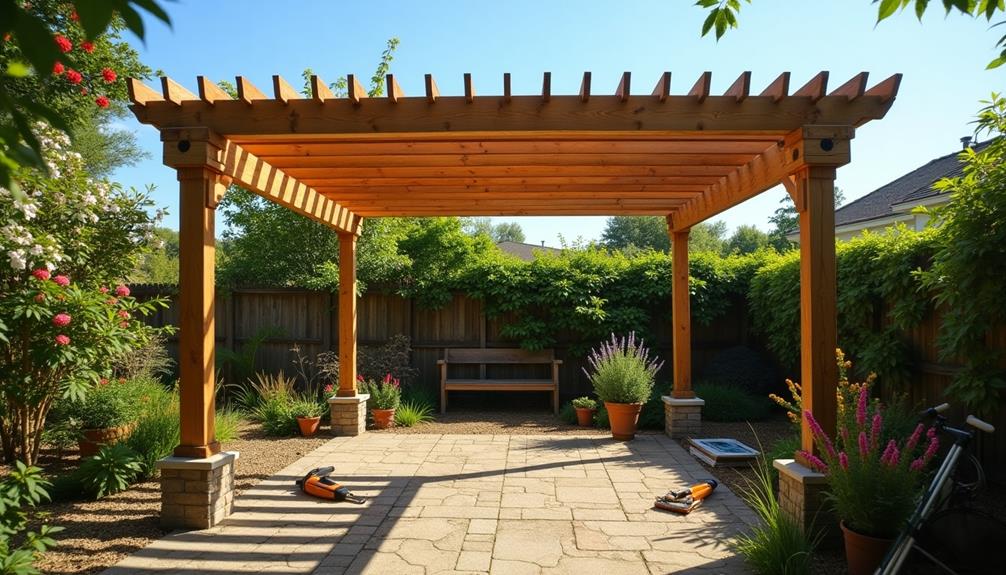
With your materials gathered and tools ready, it's time to construct the frame of your pergola. Start by laying out the four corner posts, making sure they're evenly spaced and at the desired height. Secure them in place using concrete anchors or post brackets to ensure frame stability. This foundation is crucial for supporting the entire structure.
Next, cut and attach the horizontal beams to connect the corner posts. Use a level to ensure everything's straight, as this won't only enhance the frame's stability but also improve its aesthetic appeal. Make sure to use sturdy wood that can withstand the elements.
Once the horizontal beams are in place, add the rafters. Space them evenly across the top to provide a balanced look. You might want to use a combination of long and short rafters for added visual interest. Secure each rafter with screws, ensuring they're tightly fastened for maximum stability.
Add Finishing Touches
After you've built the frame, you'll often want to enhance your pergola's appearance and functionality with some finishing touches.
Start by adding decorative lighting. String lights or lanterns can create a cozy atmosphere, especially for evening gatherings. Hang them from the beams or drape them along the posts for a warm glow. You can also use solar-powered options for energy efficiency.
Next, consider plant integration. Climbing vines like wisteria or jasmine can add beautiful greenery and shade, making your pergola feel more inviting.
Install trellises along the sides to support these plants, allowing them to grow upward and create a lush canopy. Potted plants around the base can also add color and life to the area.
Add Finishing Touches
Adding finishing touches to your DIY pergola can transform it from a simple structure into a stunning focal point in your outdoor space. One of the easiest ways to enhance its appeal is by incorporating decorative lighting. String lights or lanterns hung from the beams can create a warm, inviting atmosphere, perfect for evening gatherings.
You might also consider solar-powered lights for an eco-friendly option that requires no wiring.
Next, think about adding plant accents. Climbing plants like wisteria or jasmine can drape beautifully over your pergola, providing shade and a touch of nature. You can also place potted plants or hanging baskets around the base to add color and vibrancy.
Consider using a mix of flowers and greenery to keep things lively throughout the seasons.
Don't forget about seating options! Adding outdoor cushions or a cozy bench can make your pergola a comfortable retreat.
Maintain Your Pergola
To keep your DIY pergola looking great and functioning well, regular maintenance is essential. Start by inspecting the structure for any signs of wear or damage. Look for cracked wood, loose screws, or rusting metal brackets. Address these issues promptly to prevent further deterioration.
Seasonal upkeep is crucial for your pergola's longevity. In spring, clean the surface with a gentle detergent to remove dirt and debris. Check for any mold or mildew, and treat it immediately.
During summer, consider applying a protective sealant to shield the wood from UV rays and moisture.
In fall, trim back any nearby plants or vines that may encroach on your pergola, as they can cause unwanted damage.
Lastly, as winter approaches, prepare your pergola by removing any heavy snow accumulation to prevent structural strain.
Regular pergola maintenance not only enhances its appearance but also extends its life. By dedicating a little time each season, you ensure your pergola remains a beautiful and functional part of your outdoor space for years to come.

