Did you know that composting can reduce your household waste by up to 30%? If you're looking to create a sustainable garden, building a DIY compost bin is a practical step. You'll need to consider factors like location and materials, but the benefits of nutrient-rich soil are well worth the effort. Understanding how to maintain your compost and knowing what to add can make a significant difference. Let's explore the essential steps to get your compost bin up and running effectively.
Benefits of Composting
Composting transforms your kitchen scraps and yard waste into nutrient-rich soil, benefiting both your garden and the environment. By engaging in this practice, you contribute to nutrient recycling, which enhances soil enrichment and promotes garden productivity.
Every time you compost, you're reducing waste and minimizing your environmental impact. It's an eco-friendly practice that helps divert organic waste from landfills, where it would otherwise produce harmful greenhouse gases.
Various composting methods, such as pile composting or using a compost bin, can fit your lifestyle. As organic waste breaks down, microbial activity thrives, helping to create rich compost that nourishes your plants.
This process not only boosts soil health but also fosters sustainable gardening. You'll notice how your garden flourishes with the addition of homemade compost, leading to healthier plants and increased yields.
Incorporating compost into your gardening routine allows you to support the ecosystem, making a positive impact on nature.
You'll find that by committing to composting, you're not just improving your own garden but also contributing to a greener planet. So, roll up your sleeves and start composting; your garden and the environment will thank you!
Choosing the Right Location
Finding the right spot for your compost bin can significantly impact how well your compost breaks down. Start by considering sun exposure; a location that receives a mix of sunlight and shade is ideal. Sunlight helps heat up the pile, speeding up decomposition, while some shade prevents it from drying out too quickly.
Next, think about drainage solutions. You don't want your compost bin sitting in a puddle or overly wet area, as excess moisture can lead to a smelly mess. Look for a spot with good drainage that allows excess water to escape but retains enough moisture for the composting process.
Also, choose a location that's convenient for you. You'll want easy access to add materials and turn the pile regularly. Placing the bin near your kitchen and garden saves you time and effort.
Lastly, ensure the site is away from any structures or fences to prevent odors from lingering.
Materials Needed
Gathering the right materials for your DIY compost bin is essential for successful composting. You can start with recycled materials, which aren't only eco-friendly but also budget-friendly.
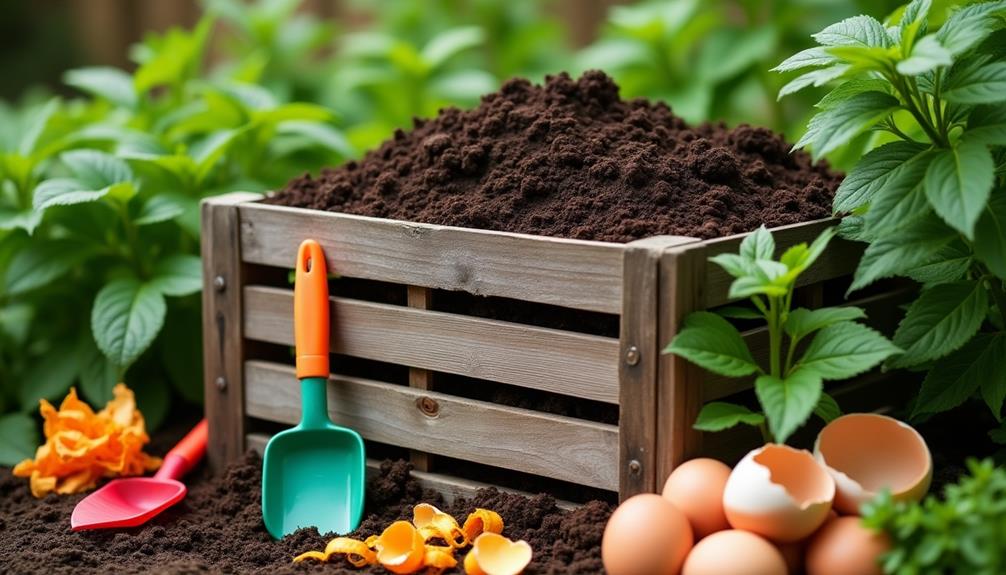
Pallets are a popular choice; they're sturdy and can be easily assembled into various compost bin designs. If you prefer something simpler, old wooden crates or wire fencing can also work well.
Next, consider the structure. You'll need screws or nails to secure your bin, along with hinges if you want a door for easy access. A tarp or lid can help keep moisture in and pests out, ensuring your composting process runs smoothly.
Additionally, you may want to include a thermometer to monitor the compost temperature, ensuring it stays within the ideal range.
It's also wise to have a digging fork or shovel on hand for turning the compost regularly.
Step-by-Step Construction
Now that you have all your materials ready, you can start constructing your DIY compost bin. First, choose a location that's easily accessible and has good drainage. Consider the design specifications; a simple square or rectangular shape works best.
Measure out your dimensions based on your size specifications. A bin that's about 3 feet wide, 3 feet tall, and 3 feet deep is ideal. This size allows for efficient composting while keeping it manageable. Cut your wooden planks or wire mesh according to these measurements.
Next, assemble the base. If using wood, lay down the planks to form a square, securing the corners with screws or nails. If using wire mesh, create a frame with sturdy stakes, ensuring it's well anchored.
Once the frame is set, attach the sides. Make sure there's enough space for airflow, so consider leaving gaps or using slatted wood.
Finally, add a lid if you want to keep out pests and control moisture.
Congratulations! You've built your DIY compost bin. Now it's time to start adding your organic waste and watch it transform into nutrient-rich compost!
Maintaining Your Compost Bin
To keep your compost bin thriving, it's essential to stick to a regular turning schedule.
You'll also want to monitor moisture levels and manage the temperature to ensure optimal decomposition.
With these practices, you'll create a rich compost that benefits your garden.
Regular Turning Schedule
Turning your compost bin regularly is crucial for maintaining an efficient decomposition process. When you mix the materials, you introduce oxygen, which is essential for aerobic bacteria that break down organic matter. Depending on your compost bin design, aim to turn your pile every few weeks. If you're using a smaller bin, a turning frequency of once a week might be ideal. Larger bins can handle less frequent turns.
When you turn your compost, make sure to mix in the outer layers with the center, where decomposition occurs most rapidly. This helps all materials break down evenly and reduces unpleasant odors. If you notice that your compost isn't heating up or smells bad, it could be a sign you need to turn it more often.
Keep an eye on your compost's texture as well. If it feels compacted, give it a good turn to aerate it.
Moisture Levels Monitoring
Keeping an eye on moisture levels in your compost bin is just as important as turning it regularly. If your compost is too dry, the microorganisms won't thrive, and your composting process will slow down. Conversely, too much moisture can create a smelly, anaerobic environment. Aim for a compost balance that's akin to a damp sponge—moist but not dripping.
To monitor moisture levels effectively, consider using moisture sensors. These handy tools can help you track the water content in your compost without constant guesswork. If you find your compost is too dry, add water gradually, mixing it in to ensure even distribution.
On the other hand, if your compost is too wet, mix in dry materials like shredded paper or straw to absorb excess moisture.
Regularly checking moisture levels not only enhances the decomposition process but also prevents issues related to odor and pests. Keep a close watch on how your compost behaves, and adjust accordingly.
Temperature Management Tips
Temperature is a key factor in the composting process, impacting the activity of microorganisms that break down organic matter. To maintain optimal conditions, you'll want to monitor the temperature regularly. Ideally, your compost should reach between 130°F and 160°F. This range promotes efficient compost thermodynamics, allowing bacteria to thrive and accelerate decomposition.
To enhance heat retention, consider insulating your compost bin. You can use straw bales or old blankets around the sides of the bin to help trap warmth.
Turning your compost regularly also helps distribute heat evenly. When you turn it, you're aerating the pile and encouraging even microbial activity, which can raise the temperature.
If you notice your compost cooling down, try adding more green materials like kitchen scraps or fresh grass clippings. These will provide the nitrogen needed to boost microbial activity.
Conversely, if it's too hot, mix in more brown materials like dried leaves to balance the carbon-to-nitrogen ratio.
What to Compost
When you're ready to compost, knowing what to include is key.
You'll want to gather kitchen scraps like vegetable peels and fruit cores, along with yard waste such as leaves and grass clippings.
These materials will help create a nutrient-rich compost that supports your garden.
Kitchen Scraps Essentials
Many people don't realize that kitchen scraps can be a goldmine for your compost bin. These everyday items not only reduce waste but also enrich your soil, making your garden thrive. Start by collecting vegetable peels, fruit cores, and coffee grounds. These kitchen scraps break down quickly, adding vital nutrients to your compost.
Avoid items like dairy, meat, or oily foods, as they can attract pests and create unpleasant odors. Instead, focus on what you can use: eggshells provide calcium, while banana peels are rich in potassium. When you toss in these scraps, you're harnessing the compost benefits of recycling nutrients back into your garden.
Don't forget about paper products! Used paper towels and cardboard can also go into your compost, adding carbon to balance out the nitrogen from your kitchen scraps.
Keep your compost pile moist and aerated by turning it regularly, and you'll see the transformation in just a few months. By incorporating these kitchen scraps into your compost bin, you're not just reducing waste—you're creating a natural fertilizer that will help your garden flourish.
Embrace the composting journey and enjoy the fruits of your labor!
Yard Waste Options
Yard waste can significantly enhance your compost bin, providing essential materials that break down into nutrient-rich soil. When you're considering what to compost, think about various types of yard waste you can include. Grass clippings, leaves, and small branches are fantastic additions. They contribute carbon and nitrogen, which are key ingredients in creating balanced compost.
You can also add plant trimmings and garden debris. Just make sure to chop larger pieces down to speed up decomposition. Avoid adding any diseased plants or weeds that might spread in your garden later on.
Another excellent option is kitchen scraps like vegetable peels and coffee grounds, which complement your yard waste perfectly. Mixing these compost types helps create a rich, diverse compost pile.
Don't forget to occasionally turn your compost to aerate it, helping break down the materials faster. By thoughtfully selecting your yard waste, you'll produce high-quality compost that nourishes your garden.
Troubleshooting Common Issues
Even the best DIY compost bins can encounter issues that frustrate eager gardeners. One common problem is unpleasant odors. If your compost smells bad, it's likely due to an imbalance in nitrogen and carbon. To fix this, add more carbon-rich materials like dried leaves or straw and turn the pile to aerate it.
Regularly checking moisture levels can also help with odor management; your compost should feel like a damp sponge, not soggy.
Another issue is pests. If you notice unwanted critters, it's essential to implement effective pest control. First, ensure you're not adding meat, dairy, or oils, as these attract pests. Instead, cover your compost with a lid or mesh to keep animals out.
You might also consider adding a layer of soil or finished compost to deter pests and help with decomposition.
Lastly, if your compost isn't breaking down, it might need more air or moisture. Turn the pile regularly and ensure it's moist but not too wet.

