Floating shelves can transform a room's aesthetic and functionality with minimal effort. You might be surprised by how easy it is to install them yourself, turning blank walls into stylish displays. However, before you grab your tools, it's crucial to consider the materials and techniques that will ensure your shelves not only look great but also hold up under weight. Understanding these key aspects will set the stage for a successful installation, so let's explore what you need to know to get started.
Benefits of Floating Shelves
Floating shelves offer a sleek and modern way to display your belongings while maximizing space. They provide aesthetic appeal that complements any room, enhancing your home's decor without overwhelming it.
With their design versatility, you can use floating shelves in various ways, whether you're showcasing books in the living room or organizing kitchen essentials.
One of the greatest advantages of floating shelves is their easy accessibility. You can reach items effortlessly, making them perfect for frequently used spaces. They also serve as affordable storage solutions, allowing you to create extra space without the need for bulky furniture.
With floating shelves, you can dive into DIY projects that reflect your personal style. Whether you opt for a minimalist look or a more eclectic arrangement, these shelves adapt to your vision, making home organization a breeze.
Choosing the Right Materials
When choosing materials for your floating shelves, consider the benefits of both wood and metal options.
Each has its unique style and weight capacity, which can affect how much you can safely place on them.
Making the right choice ensures your shelves not only look great but also hold up under pressure.
Wood vs. Metal Options
Choosing the right materials for your floating shelves can make a significant difference in both aesthetics and functionality. When deciding between wood and metal, consider the design aesthetics you want to achieve.
Wood shelves offer a warm, classic look that can complement various interior styles, from rustic to modern. On the other hand, metal shelves provide a sleek, industrial vibe that works well in contemporary spaces.
In terms of durability comparison, wood and metal have distinct advantages. Solid wood can withstand wear and tear while adding character over time, but it may be susceptible to warping or moisture damage if not properly sealed.
Metal, however, is typically more resistant to environmental factors, making it a great option for areas that experience high humidity or temperature fluctuations.
Ultimately, your choice should reflect your personal style and the intended use of the shelves. If you want to display decorative items, wood may be your best bet for its inviting appearance.
If you're looking for a more modern, minimalistic approach, metal could be the ideal choice. Weigh these factors carefully to find the perfect match for your space.
Weight Capacity Considerations
Understanding the weight capacity of your floating shelves is vital for ensuring they hold the items you plan to display safely. When choosing materials, consider both the shelf weight and the load distribution. Solid wood shelves typically have a higher weight capacity compared to particleboard or thin plywood. If you're displaying heavier items, like books or decorative objects, opt for thicker shelves made from sturdy materials.
Additionally, the brackets you choose play a crucial role in supporting the shelf weight. Heavy-duty metal brackets can provide greater stability, especially when installed directly into wall studs. If you're using floating shelf brackets, ensure they're rated for the weight you intend to place on them.
Don't forget about load distribution; it's important to spread out the weight evenly across the shelf. Placing all your heaviest items on one end can lead to sagging or even failure.
As a rule of thumb, always check the manufacturer's specifications for weight limits and install your shelves accordingly. By carefully selecting the right materials and considering these factors, you can enjoy your floating shelves without the worry of them collapsing under the weight.
Tools and Supplies Needed
To install floating shelves successfully, you'll need a few essential tools and supplies.
Gather items like a drill, level, and brackets, along with the right materials for your shelves.
Having everything ready will make the installation process smoother and more efficient.
Essential Tools Required
Gathering the right tools is crucial for successfully installing floating shelves. You'll want to start with a power drill, which is essential for making holes in the wall for your anchors. A level is also a must-have; it ensures your shelves are perfectly straight, enhancing your shelf design's visual appeal. A stud finder will help you locate wall studs, providing a sturdy foundation for your installation techniques.
Additionally, keep a tape measure handy for precise measurements, as accurate spacing is vital for a polished look. A screwdriver will be necessary for securing brackets or anchors, while a pencil is great for marking where you'll drill. If you plan to use wall-mounted brackets, include a wrench for tightening them down.
Lastly, safety goggles and a dust mask can protect you while you work, especially if you're drilling into drywall. By having these essential tools at your disposal, you'll set yourself up for a smooth installation process, allowing you to focus on creating the perfect shelf design for your space.
With everything ready, you can approach your project with confidence and efficiency.
Materials for Installation
Once you've got your tools ready, it's time to focus on the materials you'll need for installing floating shelves.
First, you'll need shelf brackets that can support the weight of your shelves and the items you'll place on them. Make sure to choose sturdy brackets made from metal or heavy-duty plastic, depending on your style preference and load capacity.
Next, gather wall anchors, especially if you're mounting the shelves on drywall. Wall anchors help distribute weight and prevent the shelves from pulling away from the wall. Choose the right size for your brackets; there are various types, including toggle bolts and plastic expansion anchors.
You'll also want screws that match your brackets and anchors. Check the packaging for the recommended screw size.
Lastly, consider a level to ensure your shelves are straight and a tape measure to determine the proper spacing.
With these materials in hand, you're set to create a stylish and functional display in your space. Remember, investing in quality materials will pay off in durability and aesthetics.
Happy installing!
Measuring and Planning Installation
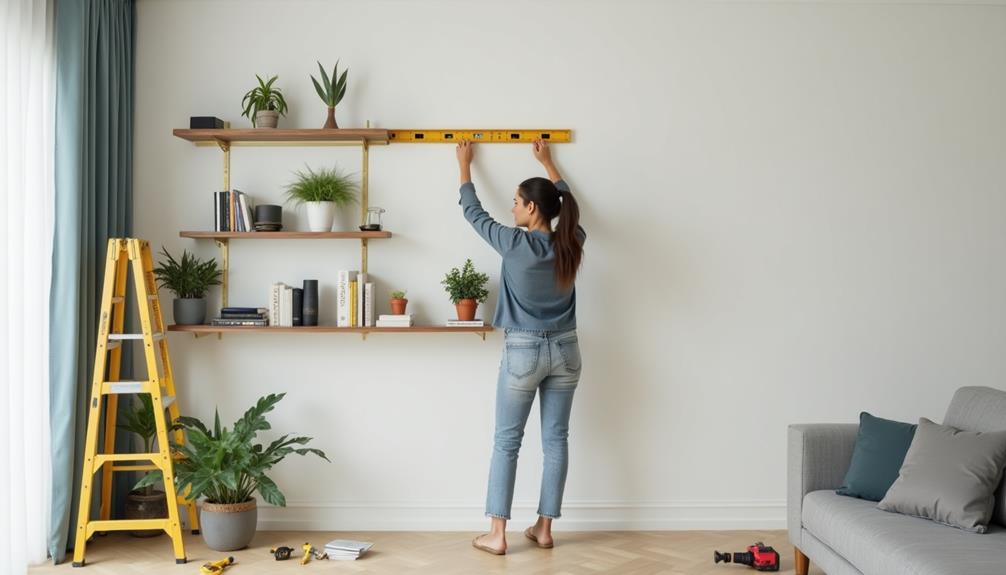
Before you dive into the installation of floating shelves, it's crucial to take accurate measurements and plan accordingly. Start by determining the ideal shelf placement based on your needs and the items you plan to display. Think about the height and spacing—typically, shelves should be around 12 to 18 inches apart.
Next, assess wall compatibility. Not all walls can support floating shelves equally. Use a stud finder to locate wall studs, as they provide the best support. If you're dealing with drywall, be cautious about weight limits and consider using wall anchors for added stability.
Once you've identified your shelf placement and wall compatibility, mark the locations with a pencil. This will help you visualize the final look and ensure everything is level.
It's also smart to measure the width of your shelves to ensure they fit the intended space without overcrowding.
Installation Steps Overview
Installing floating shelves can be a straightforward process when you follow a clear set of steps.
First, determine your shelf placement. Consider the height and location where you want the shelves. Visualize how they'll look and function in your space, keeping in mind the items you plan to display.
Next, gather your tools and materials. You'll need a level, drill, screws, wall anchors, and the floating shelf brackets. Make sure you have everything ready to prevent interruptions during installation.
Once you've marked your desired shelf placement on the wall, use a level to ensure your markings are straight. Drill holes for your anchors, making sure to use the correct bit for the wall type.
Afterward, follow any specific installation tips provided with your floating shelf kit. This usually includes installing brackets or supports to hold the shelves securely.
Securing the Shelves Properly
Properly securing your floating shelves is crucial for both safety and functionality. To achieve optimal shelf stability, you need to choose the right brackets. The selection of brackets depends on the weight capacity required for your shelves and the items you plan to place on them. Sturdy brackets made from durable materials like steel or heavy-duty plastic provide the best support.
Once you've selected your brackets, ensure they're installed correctly. Start by marking the placement on the wall, using a level to guarantee alignment. Drill pilot holes into the wall studs, as securing the brackets to these will enhance stability. If wall studs aren't available, use appropriate wall anchors to prevent any sagging or damage.
After attaching the brackets, double-check that they're level before placing your shelves on them. This step is essential to avoid any tilting or uneven weight distribution, which could lead to accidents.
Styling Your Floating Shelves
Styling your floating shelves can transform a simple wall into a stunning focal point in your room. To get started, think about your shelf decor. Consider mixing different types of objects, such as books, plants, and decorative items. This variety adds visual interest and personality to your space.
Next, focus on color coordination. Choose a color palette that complements your room's overall aesthetic. For example, if your decor features warm tones, opt for earthy decor elements. You can also use contrasting colors to make certain items pop.
When arranging items, use the rule of threes. Group your decor in sets of three or five; this creates a more balanced and visually appealing display. Vary the heights of your decor to draw the eye upward and create depth—tall books or decorative vases can elevate shorter items like picture frames.
Don't forget about negative space; leaving some areas empty can prevent your shelves from feeling cluttered.


